Gift Cards
Setting Up Your Home Studio, on a Budget!
WHY A HOME STUDIO?
For those of us who live in the PNW, we know some of its secrets... like those overcast days are actually very helpful days. But those rainy days may not always be so helpful, at least not when it comes to working with clients for portraits, right? Or, in winter, when the sun sets at 4:00 pm, can you capture the images your clients want in the evenings?
When we think about some of the limitations of working in the elements, we get curious about the possibilities of transitioning at least some of those sessions into a more controlled space. One way to tackle the idea is to rent a studio at a day rate here and there, or perhaps commit to a community space.
Another option that is appealing for many is to create that space in your own home. Maybe you have space in your garage or living room that you could make into a studio. If you've been contemplating something like this and wondering where to start, this post is for you!
With that concept in mind, I wanted to share a list of items that aren’t too expensive to get you started making your own, in-home studio setup. Almost every item on here is something that I own or use/rent on a regular basis to create work for clients, and sometimes just have fun.
My work is primarily in portrait photography, however, I also use these tools for products, food, flowers, and many other genres.

BACKGROUNDS
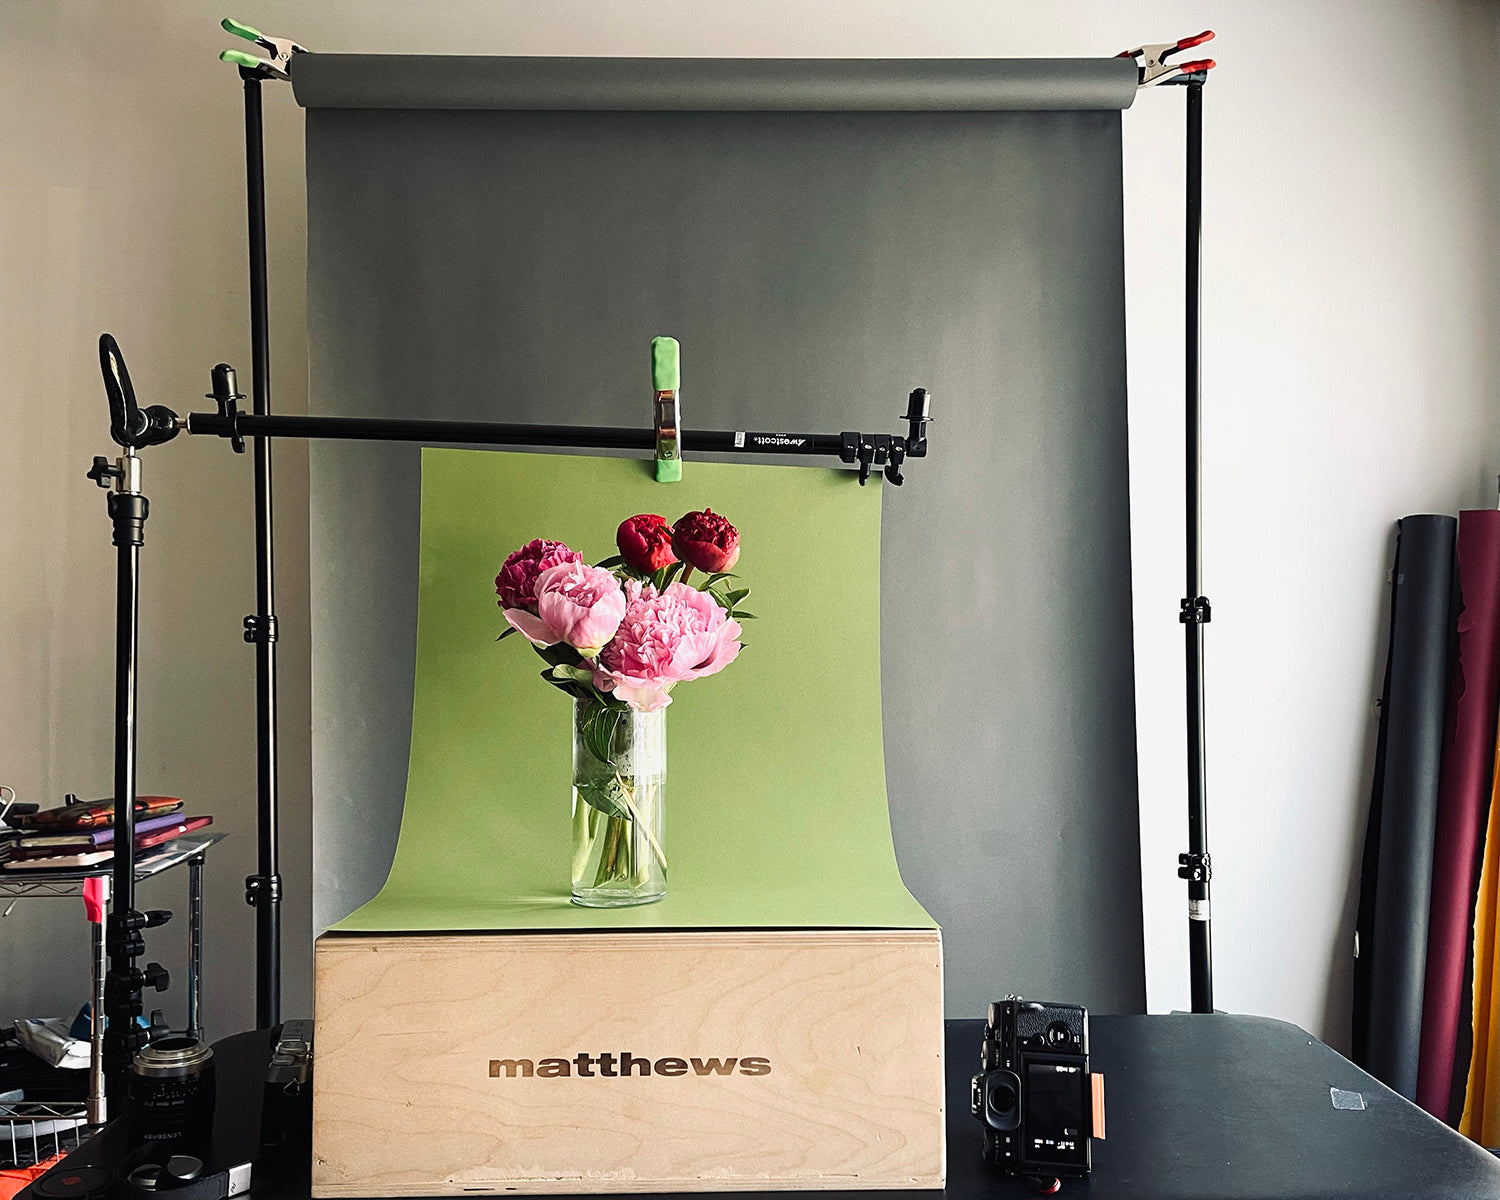
Background Stand + Seamless Paper or Westcott X Drop
I have both of these options. I keep the background stand set up and can easily change paper based on what the client wants. I highly recommend going with basic options to start, like black, gray, or white. I always have gray on hand, I can make it dark or light or use gels to have a pop of color. Going with something like Thunder Gray is a solid, choice as it is quite neutral. I do mostly individual portrait or headshot sessions so the 53” roll works for me, but there are other sizes available.
The Westcott X Drop system is great for location work but I often use this in the studio too. I have Neutral Gray, but if you want to go full-on high key, look at white or if you like more dramatic work, consider Black. It folds up nice and small and can go anywhere. .

LIGHTING
There are so many lighting options, this part could be a bit overwhelming. I want to give you a couple of options to get you started without breaking the bank.
The first thing to consider is: do you have any speedlights or any lighting already? If so, you can add light stands and modifiers to have more control in the look of those small lights.
If you don't have any lighting at all, check out some of these options:
Speedlights / Small Flash Units
These are pretty powerful and great if you think you might go on location and work in your little studio area.
You could opt for a flash that is made by the same brand your camera is made by or check out the Godox options, my go-to from Godox is the V860II, I like that it has a rechargeable battery and is the most powerful in these much smaller lights. Be sure to get a flash that works with your camera's hot shoe, so you have lots of flexibility in the use of that flash.
If you are going to start out with speedlights, you need adapters to mount the speedlights to a light stand, like these from Phottix, Padat & Phottix Saldo
Want bright or bigger light?
Take a peek at the Godox AD200 or AD300, either of these will offer a fair bit of power but not break the bank!
Fan of Westcott? Check out the FJ80, FJ200, or FJ400, the higher the number the more powerful the light.
Don’t forget… Transmitter System
A wireless remote that will work with your camera to the light. Godox and Westcott all have their own systems or you can look at something like Pocket Wizards if you are going to blend brands of lighting.

LIGHTING MODIFIERS
Lights are great, but often we want to use some kind of modifier to manipulate and shape the light. Perhaps you want to create big, beautiful, soft window light, then you want a really big softbox or parabolic umbrella. If you want to create more dramatic and dynamic lighting then you might look at a beauty dish.
I love these options...
For Speedlights: Westcott Apollo Kit & MagMod Modifiers, I very often use a Westcott Apollo soft box as a key light and MagMod for hair lights.
For Strobes: Westcott Switch system, which includes smaller softboxes like beauty dishes to larger softboxes for replicating big, beautiful window light:
Check out more great options from Interfit.
When you buy a modifier, be sure to get a speedring ring or speed light adapter ring to work with the lights you already have or are going to purchase.
Many modifiers may not need a speedring, especially if you are using speedlights with something like the Apollo system from Westcott.

LIGHT STANDS & BOOM ARMS
You need something to hold those lights! I prefer stands that are a little more expensive but are also a little more sturdy. I often go from a larger studio strobe to a flash so flexibility is key.
My go-to stand is the 10’ Westcott stand, but if you can swing it I would highly recommend C-stands by Matthews, Kupo, or Avenger, those will last you forever!
A boom arm comes in handy when you really want to place a light above your client or have more flexibility in the directionality of your light.
I have the Westcott mini-boom arm, which I use daily. You could also look at Avenger if you need something a bit more heavy-duty.
OTHER GENERAL GRIP EQUIPMENT
Other tools I always have around include:
Things like sandbags and gaffer tape help me keep my space neat and organized, with very little for someone to trip over, or knock over. Set safety is really important!
WHEW!!!
Ok, that is a big list! But fear not... if you have questions, come in to check out the pieces and parts in person, or give us a call, to help over the phone.
**All images by Kate Hailey**
About the Author:
Kate Hailey is a freelance portrait photographer and photo educator based in Seattle, WA.